Manage custom messages in the Vault UI
Vault Enterprise license required
Use custom banners and modals in the Vault UI to share system-wide alerts for all Vault UI users.
Best practices for UI messages
Messages are sticky. Users can only dismiss messages temporarily. The message reappears if the user refreshes their browser window or logs out of the current session.
Messages are intrusive. Limit the number of active messages to minimize the intrusion on users and reduce the chances that they will dismiss the message without reading it.
Messages are inheritable. Child namespaces inherit all messages created on the parent namespace. Take advantage of inheritance to reach the greatest number of users with the smallest number of messages.
Delete old messages. Vault supports a maximum of 100 messages per namespace at a time. Practice good message hygiene by regularly deleting expired and outdated messages.
Before you start
- You must have Vault Enterprise 1.16.0 or higher installed.
- You must have the appropriate permissions:
- You must have
listpermission for thesys/config/ui/custom-messagesendpoint. - To create messages, you must have
readpermission for thesys/config/ui/custom-messages/:idendpoint andcreatepermission for thesys/config/ui/custom-messagesendpoint. - To edit messages, you must have
readandupdatepermission for thesys/config/ui/custom-messages/:idendpoint. - To delete messages,
deletepermission for thesys/config/ui/custom-messages/:idendpoint.
- You must have
Add a custom message
Navigate to the Settings section in the Vault UI sidebar and select Custom Messages.
On the Custom messages page, select whether you want the message to appear on the Vault UI login page or after a user logs in.
Select the + Create message button in the toolbar to open the Create message form.
On the Create message form:
- Select the locations where your message should appear.
- Select the message type.
- Provide a title and the message text. For important messages, we recommend keeping the text short and including a link to more information rather than writing a longer message that users may not take the time to read.
- Set a start time when your message will publish. By default, messages publish at midnight in your local timezone.
- Set an optional end time for the message. By default, messages do not expire.
Click Preview to see how your message will appear to users.
Click Create message to save your new message.
Create messages for a specific namespace
Child namespaces inherit all messages created on the parent namespace. For example, assume you have a cluster with the following namespace hierarchy:
Custom messages created on the admin namespace apply to all child namespaces:
finance, marketing, marketing/digital-marketing and marketing/events.
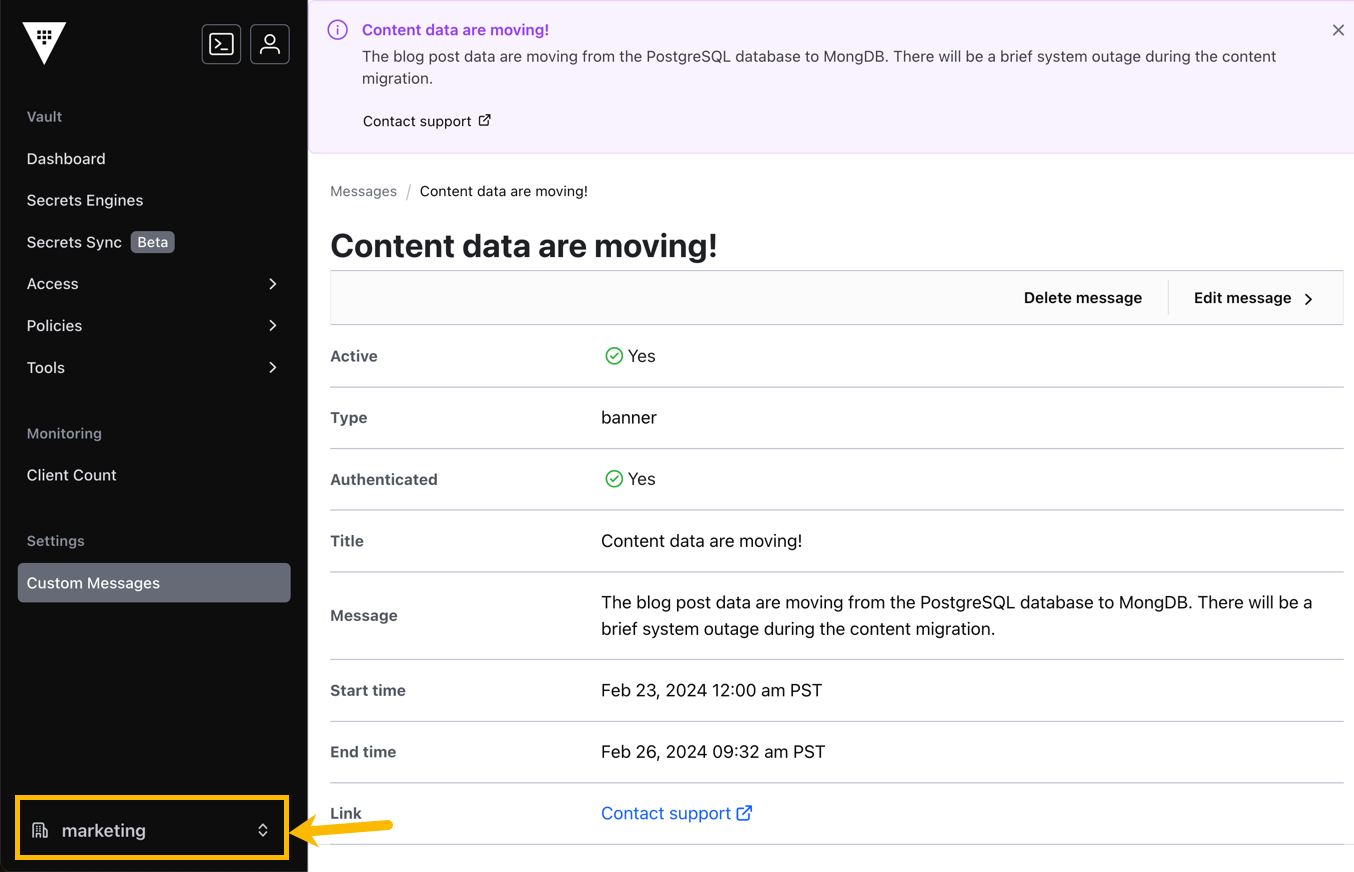
To create a custom message that only targets the marketing team, log into the marketing namespace before creating your message.
To create a message under a specific namespace:
On your Vault login page, enter the namespace you want to target in the Namespace text field.
Select an appropriate authentication method and log in.
Select Custom Messages.
Select the + Create message button in the toolbar to open and fill out the Create message form.
Click Preview to see how your message will appear to users.
Click Create message to save your new message.
Your new message only appears when a user logs into the targeted namespace or one of its child namespaces. You can verify that your message has the correct behavior by logging into an admin or parent namespace. The message should only appear when you switch to the targeted namespace.

Edit a custom message
You can open the edit screen for a custom message in two places from the Custom messages page.
From the additional options menu for the message:
- Find the custom message you want to edit.
- Click the additional option button (three dots).
- Select Edit from the dropdown menu to bring up the edit page.
From the message details page:
- Find the custom message you want to edit.
- Select the message to open the message details page.
- Click the Edit message button to bring up the edit page. Fill in the information that you would like to edit for the custom message.
Delete a custom message
Message deletion is permanent
Deleted messages cannot be recovered. If you delete a message by mistake, you will have to recreate it.You can delete a custom message in two places from the Custom messages page.
From the additional options menu for the message:
- Find the custom message you want to delete.
- Click the additional option button (three dots).
- Select Delete from the dropdown menu to bring up the delete confirmation modal.
From the message details page:
- Find the custom message you want to delete.
- Select the message to open the message details page.
- Click the Delete message button to bring up the delete confirmation modal.